Taking Back Memory From Vmmem/WSL
April 07, 2020
P.S. Scroll down to ‘The Solution’ for the fix.
For the past couple months, I’ve been using Windows Subsystem for Linux to write code and program inside a Linux system on my Windows 10 Home PC without having to bother with either VMware or Docker.
VMware feels super archaic in the world of Docker images and Kubernetes. Creating shells take so much memory and every single instance of an OS inside VMware takes entire chunks of memory/CPU. Meanwhile, if you have Windows 10 Home, you don’t have access to Hyper-V which is the engine that allows proper virtualization on Windows, thus you can’t use Docker Desktop on your system and have to settle for Docker Toolbox. I don’t want to go too deep into the subjects of my other blogs.
WSL allows me to run a GNU/Linux environment — including most command-line tools, utilities, and applications — directly on Windows, unmodified, without the overhead of a virtual machine.
The Problem
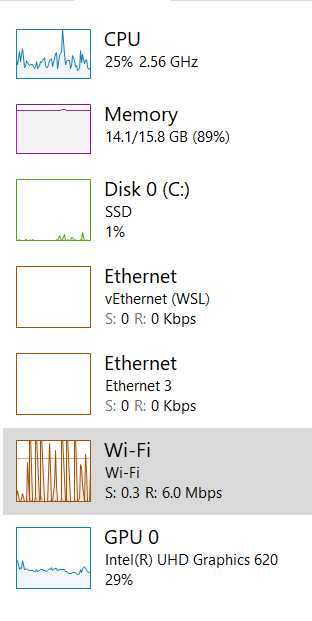
WSL promised me super low resource usage, but I was really surprised to see my RAM usage at almost full capacity while I was working.
Looking For The Problem
I assumed it was my browser hogging all that RAM because I never have lesser than 50 tabs open. I close dozens of tabs everyday but reopen more. At this point, I’ve had to allocate “Spring Cleaning” sessions for my browser every couple weekends. You probably know the struggle, devbros.
Finding The Culprit
I closed up my browser, and checked my RAM usage and was suprised to see that something called Vmmem was eating up 4GB.
After a quick search and making sure that a cryptocurrency mining malware hadn’t infected my system, I found this description on the web.
The vmmem process is a virtual process that the system synthesizes to represent the memory and CPU resources consumed by your virtual machines. In other words, if you see vmmem consuming a lot of memory and CPU resources, then that means your virtual machines are consuming a lot of memory and CPU resources.
Well then, this isn’t supposed to happen, right? Even VMware doesn’t eat this much.
Figuring A Fix
First step for me was checking how much memory was Ubuntu consuming using the free -h command inside my WSL terminal.
free displays the total amount of free and used physical and swap memory in the system, as well as the buffers and caches used by the kernel. The information is gathered by parsing /proc/meminfo. -h or --human shows all output fields automatically scaled to shortest three digit unit and display the units of print out.
When I saw my entire memory under total instead of how much vmmem was hogging, I remembered reading that WSL uses your entire RAM as it’s own. And moreoever, only 101MB was actually being used by the distro.
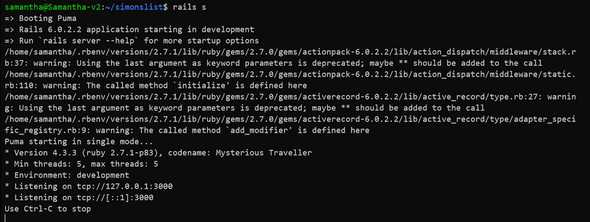
I started up a Rails server to see if there were any changes.
Huh. It only increased my used RAM to 169MB. Yet, Vmmem continued to consume the same amount.
Anyway, after jumping around from Github Issues to WSL documentations, I figured I had to actually stop the WSL processes to reclaim the memory.
The Solution
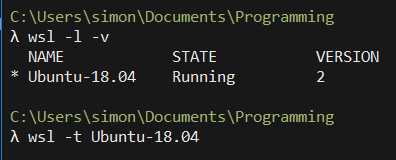
Use wsl -l -v to check out all running distros on your WSL.
Then, wsl -t {insert distro} to terminate the ones in use. Or, simply wsl --shutdown.
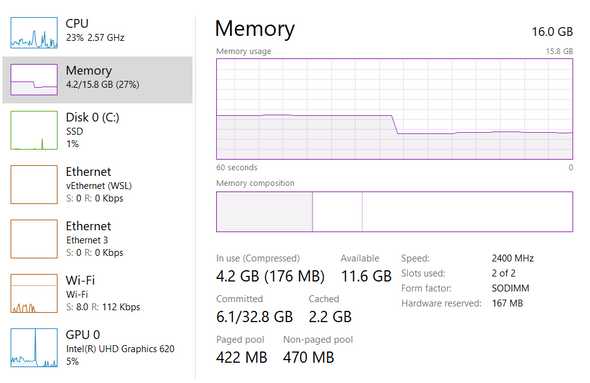
You’ll get back the memory from WSL, and you can see the drop in RAM usage in the screenshot above.
Takeaway
WSL does use a really low amount of RAM but it is allocated about 4GB by default when it is started. If you think that’s too much and would like to decrease it, Windows Insider Build 18945 brough customizable settings for wsl.
Create a %UserProfile%\.wslconfig file and use it to limit memory assigned to WSL2 VM.
[wsl2]
kernel=<path>              # An absolute Windows path to a custom Linux kernel.
memory=<size>              # How much memory to assign to the WSL2 VM.
processors=<number>        # How many processors to assign to the WSL2 VM.
swap=<size>                # How much swap space to add to the WSL2 VM. 0 for no swap file.
swapFile=<path>            # An absolute Windows path to the swap vhd.
localhostForwarding=<bool> # Boolean specifying if ports bound to wildcard or localhost in the WSL2 VM should be connectable from the host via localhost:port (default true).

# <path> entries must be absolute Windows paths with escaped backslashes, for example C:\\Users\\Ben\\kernel
# <size> entries must be size followed by unit, for example 8GB or 512MB
Therefore, in your situation, all you need to include in your file is ⤵
[wsl2]
memory=1GB
Customize it as necessary with the available options.


